
App store
Directly to your phone from Appstore
These steps will help with installation of the Linus® Smart Lock.
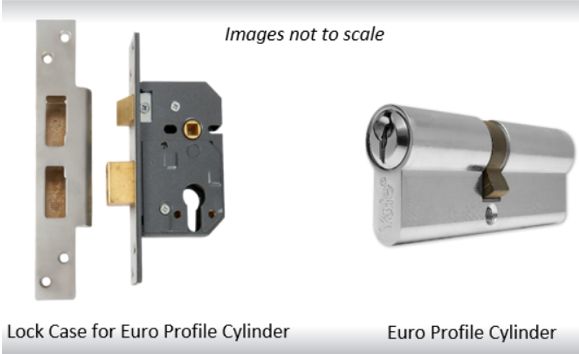
The Euro profile cylinder is a type of pin tumbler cylinder lock. Pin tumbler locks were invented by Yale’s founder Linus Yale Sr. in 1844. His son, Linus Yale Jr. then improved his father’s invention and finally received the famous patent for a lock with a round cylinder, five pin tumblers, and flat key on June 27th, 1865 Cylinder locks differ from some other type of locks, as the lock case (the part of the lock which fires the bolt) is a separate component from the locking cylinder (the part of the lock where you put your key into). This means that if required, the cylinder can be changed relatively easily without having to change the lock case within the door.
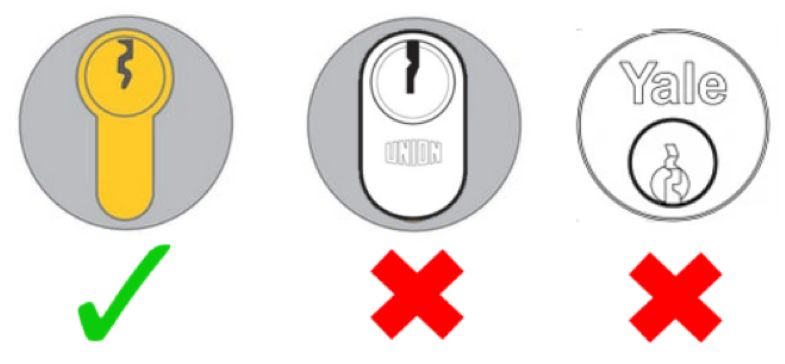
The best way to identify if you have a euro cylinder at home is to look at the lock on your door, from there you can check for the Euro profile cylinder shape. See below for details on what to look for:
This page will guide you through installing your Linus lock onto a compatible Euro Profile cylinder. If you need instructions on installing the Yale Linus® adjustable cylinder, they can be found here.
There are two ways to install the Linus lock, depending on whether your cylinder sticks out from your door furniture on the inside of your door by at least 3mm. In the video on the side you will find both reported.
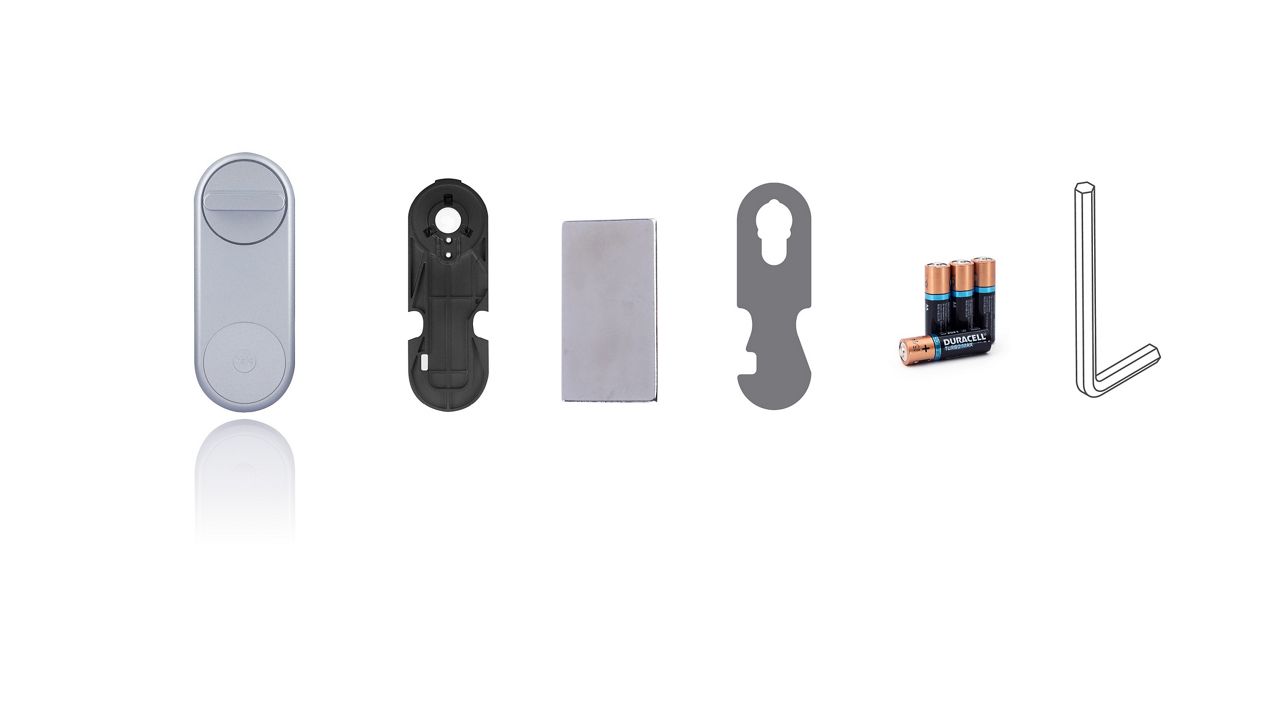
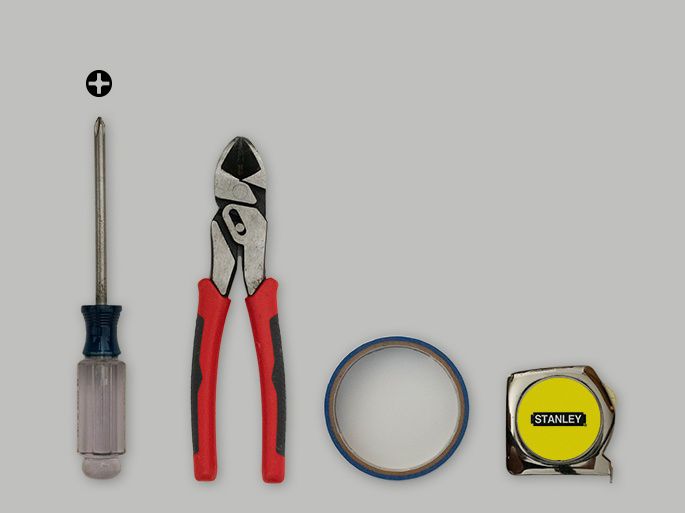
Here you see which components are included in the box and which tools you need to carry out the installation of your new Yale Linus® Smart Lock.
The box contains the following components:
For a standard installation, the tools required are:
Take the Linus® unit out of the box and open the wings to remove the mounting plate.

Add the mounting plate onto the internal side of your existing cylinder. You may need to loosen the grub screws (the screws on the mounting plate that go around the cylinder) in order to secure the plate properly. This can be done using the Allen key that is provided in the box. Once the plate is on the cylinder, tighten the screws back up holding the short end of the Allen key.

Insert the key into the internal side of your cylinder.

Mount the Linus® unit onto the mounting plate pushing the top of the unit onto the mounting plate first.

Close the ‘wings’ on the Linus® unit to securely fix it in place.

Step 6. Peel the backing film from the DoorSense™ magnet

Stick the DoorSense™ magnet on the door frame, level with the Yale logo on the Linus® Smart Lock.

Directly to your phone from Appstore
Directly to your phone from Google Play